We use the words “simple” and “easy” a lot. “Simple is best.” “We simplify the paperwork”. “Easy way to process contracts and invoices.” And when we’re feeling extra feisty, we throw in “easy peasy.” But the reason we talk about simplicity so much is because it’s our number one priority. Making the not-so-fun parts of running a business easier (and quicker) means more time for what we’d all rather be doing. While invoicing probably isn’t everyone’s favorite task, it is one of our most fundamental features. And we’re proud to say that even with all the bells and whistles, RPC invoices are easy to create, send, update, and pay.
RPC offers 2 types of invoices
Rock Paper Coin offers two different ways to invoice, unlimited payment structure options, tax, discount, and gratuity selections, and sophisticated alerting for upcoming due dates.
First things first. Here are the 2 types of RPC invoices.
1. Client invoice
A client invoice allows both you and your client to utilize RPC to the fullest. Your client will sign up on RPC with their own (FREE) account to view and manage their invoices. Doing so also allows them to access invoices from other vendors, securely store their payment information, see dashboard reminders, track budget, and receive and sign contracts.
2. Guest invoice
Guest invoices are meant for 1-off events, quick turnarounds, clients who don’t need a contract to accompany an invoice, and clients who do not wish to sign up for RPC. They are paid via email with no signup.
Two ways to send an invoice
1. Invite + Send – for clients who have not signed up on RPC yet
If you’re ready to send a client invoice but your client has not signed up on RPC yet, don’t worry! We’ve got that covered.
- Click “+ Invite” from your dashboard

- Enter your client’s name and email address
- Check the “Invoice” box (and Contract too, if you’re ready!)
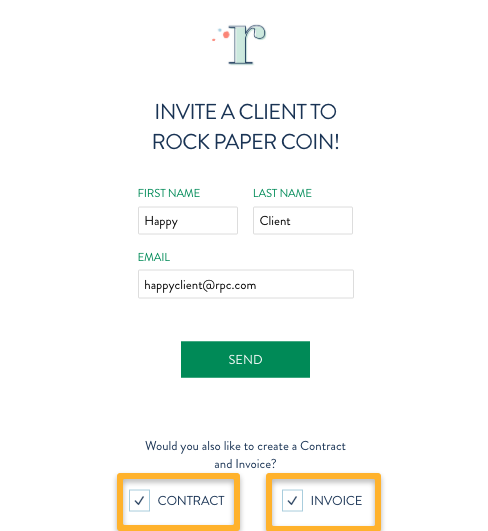
- Click the green “Send” button
- This will allow you to generate and send an invoice and/or contract along with your invitation. We LOVE this feature because you don’t have to wait for clients to sign up before sending them documents. And it makes things easy for clients when they sign up – as soon as they complete their account, they have documents waiting for them!
2. Send an invoice to a client that is already signed up on RPC
If your client is signed up on RPC already, you can quickly send an invoice by:
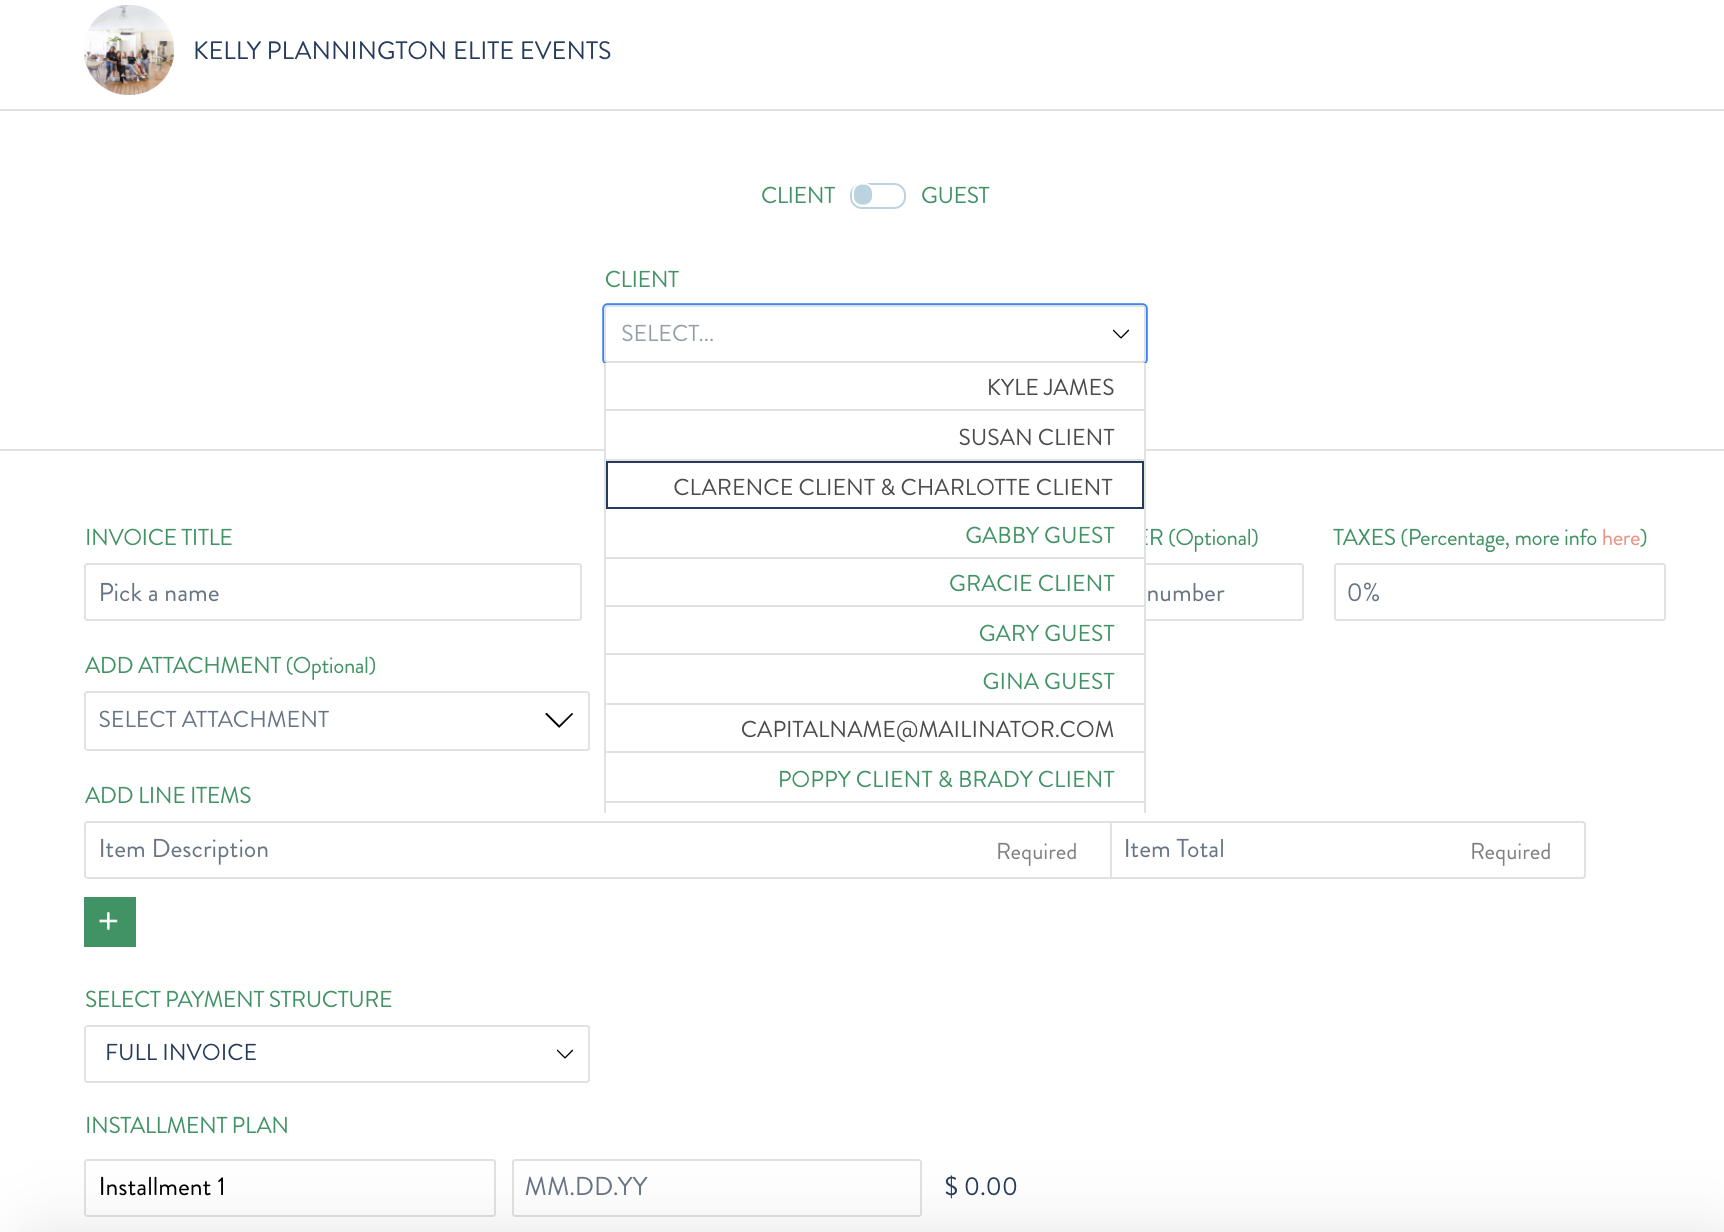
- Clicking “+ Invoice” form your dashboard or Invoice page
- Select the client name from the drop down menu
Creating a client invoice
- Navigate to a new invoice by one of the methods above (Invite + Send or selecting name from invoice dropdown menu)
- Enter your invoice title, event date (optional), invoice # (optional), and taxes if applicable.
- If you have an attachment you would like to include along with your invoice, select it from your computer. All major file types are accepted here (.jpg, .pdf, .doc, .docx, .csv). For example: bakers tend to include a cake sketch. Florists send a .pdf design board. Planners attach a checklist. Use it however you see fit!
- Next is adding line items. Enter applicable line items and totals. Click the green “+” to add additional line items.
- Select a payment structure. If you would like to evenly distribute the invoice, select from the drop down menu. If you would prefer custom allotments, select “custom” — for instance, if you want to charge a $250 deposit up front, followed by 5 payments of varying amounts. Selecting the custom option allows you to set any payment structure you want – even monthly payments. Note: be sure to calculate and add any necessary tax or discount amounts as these are not auto populated on custom payment structures.
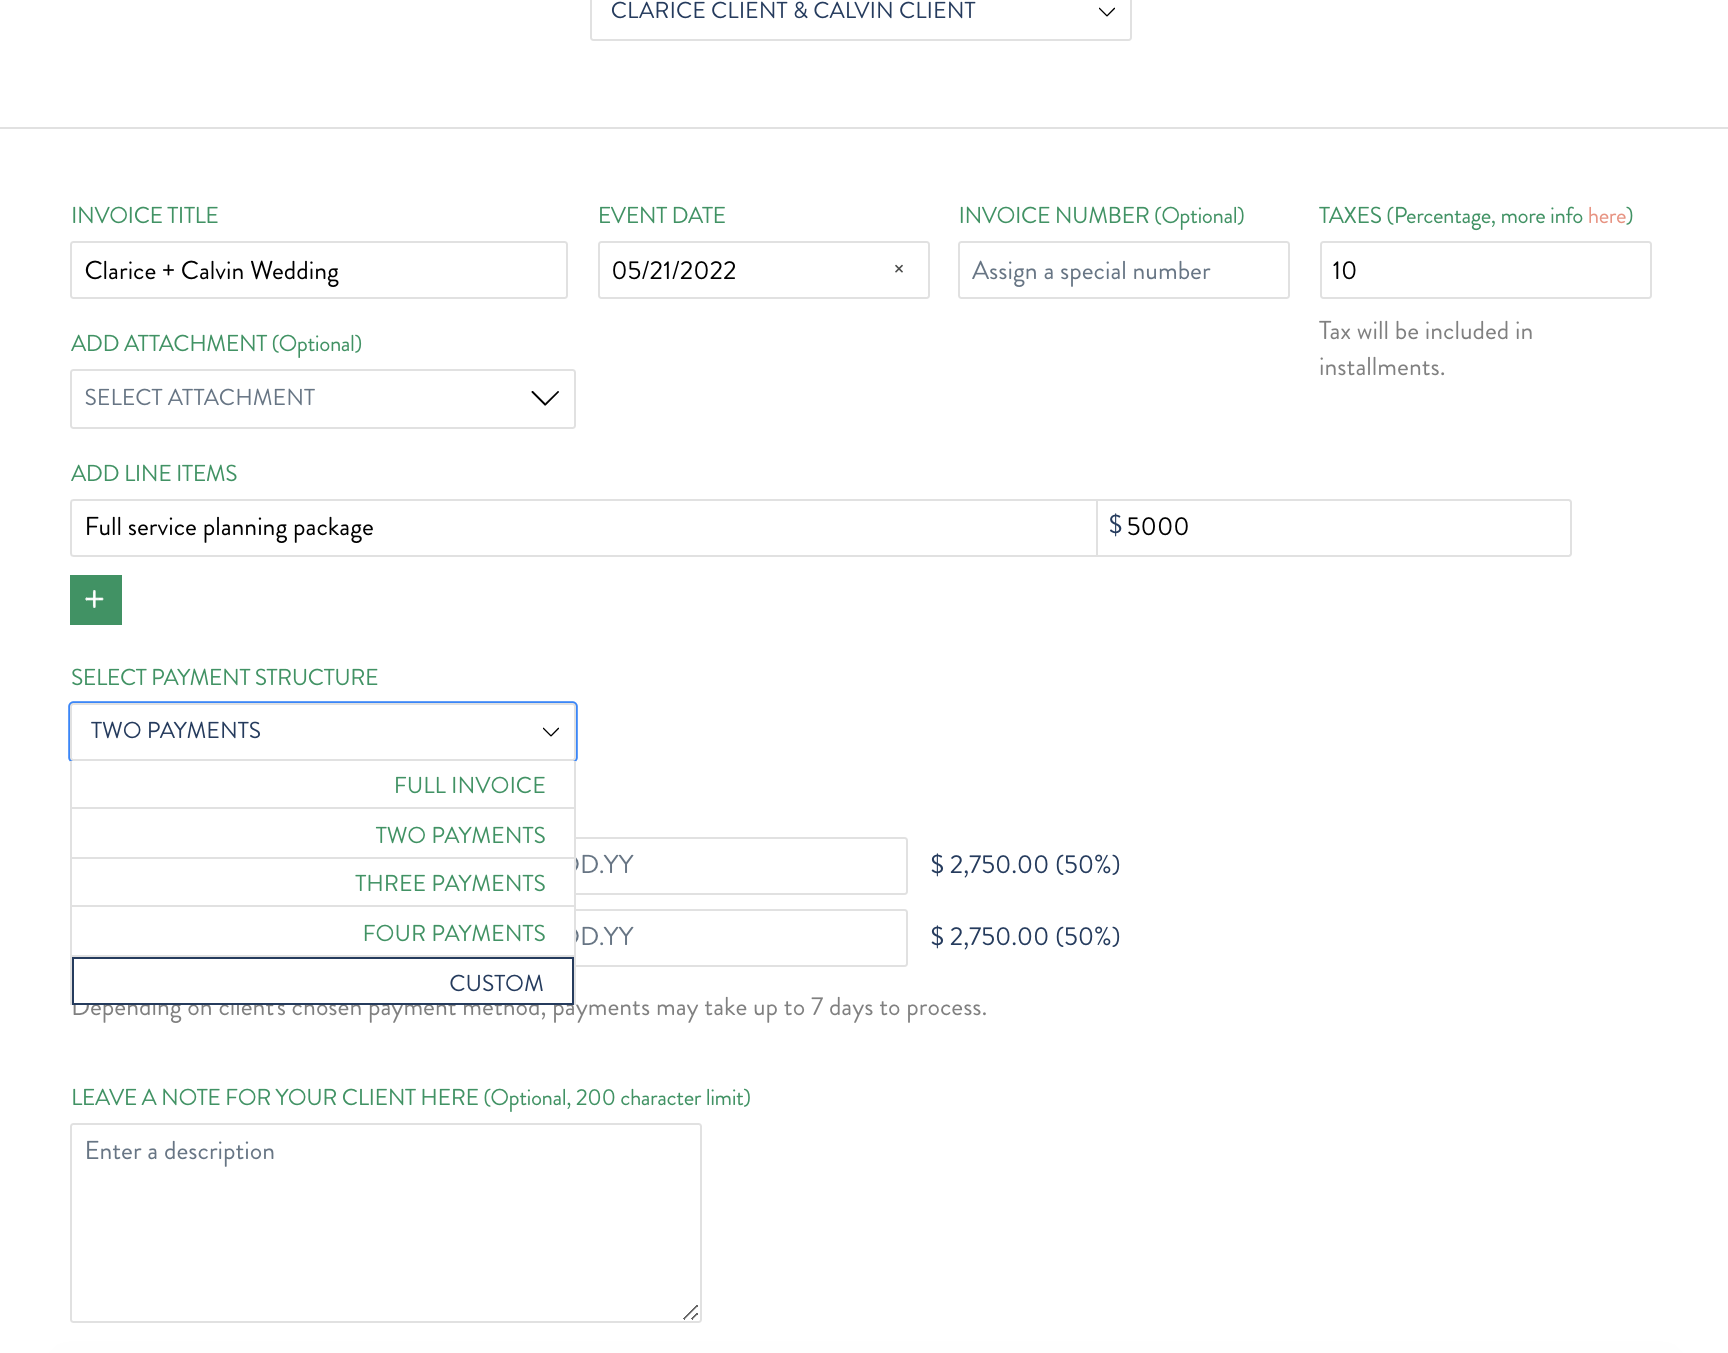
- Determine your Installment plan. Title your installments so clients can quickly see what each payment is for. Select your due dates. This is worth a double-take since these dates determine when the reminder emails go out.
- Leave a note (optional). The note field can be used to call out specific details or terms – or simply share a fun message like, “I can’t wait for your big day!” This note is seen by your client.
- Invoice discount (optional). An easy way to extend a dollar or percentage amount off your services.
- If you aren’t ready to send quite yet, click “Save Draft”
- If you’re ready to fire the invoice off, click “Send”. Clicking send will generate an email to your client notifying them that they’ve received an invoice from you. When they sign up/in to their RPC account, they will see it on their dashboard as well as their Invoices page.
Creating a guest invoice
Guest invoices are built exactly like client invoices – with one difference:
- Select “guest” at the top of your new invoice
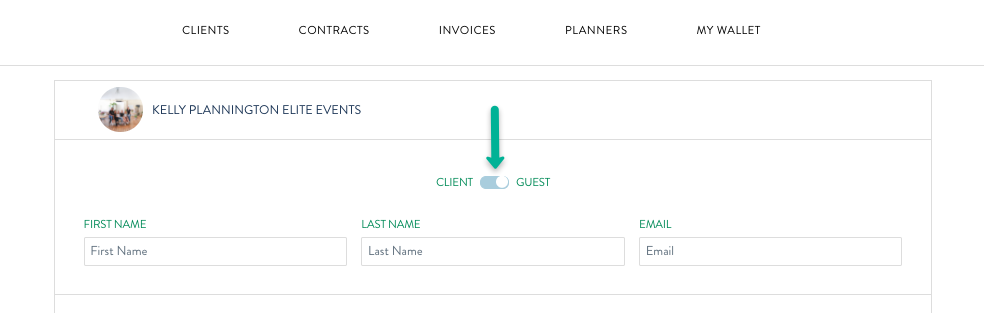
- Enter your client’s name and email address
- Fill out all other invoice fields the same way as a client invoice. You can enter as many line items as you would like, determine any payment structure, extend a discount, etc
- Clicking send will fire an email to your client – and they pay the invoice from a link in their email. No signup!
Did you know?
You can update invoices after they have been sent – and even after a payment has been made. Just click on the invoice (from your Invoice page), click “Update” and make any changes you need to event date, installment dates, total, add a line item, change the payment structure. All fields are editable up until an invoice has been fully paid. Don’t forget to ‘resend’ the new copy to your client so they have the correct invoice!